Self-Signed Server Certificate
Step-by-step guide to generate and install a Server SSL certificate.
Step-by-step guide to generate and install a Server SSL certificate.
This document will show you can generate a server certificate with BounCA. We assume you have a working BounCA and create a certificate authority, see Create Root Certificate Authority.
You can use a server certificate to configure secure (SSL/TLS) and trusted connections, such as HTTPS, but also SMTP, IMAP etcetera.
Enter the dashboard of your intermediate CA which must sign your server certificate.
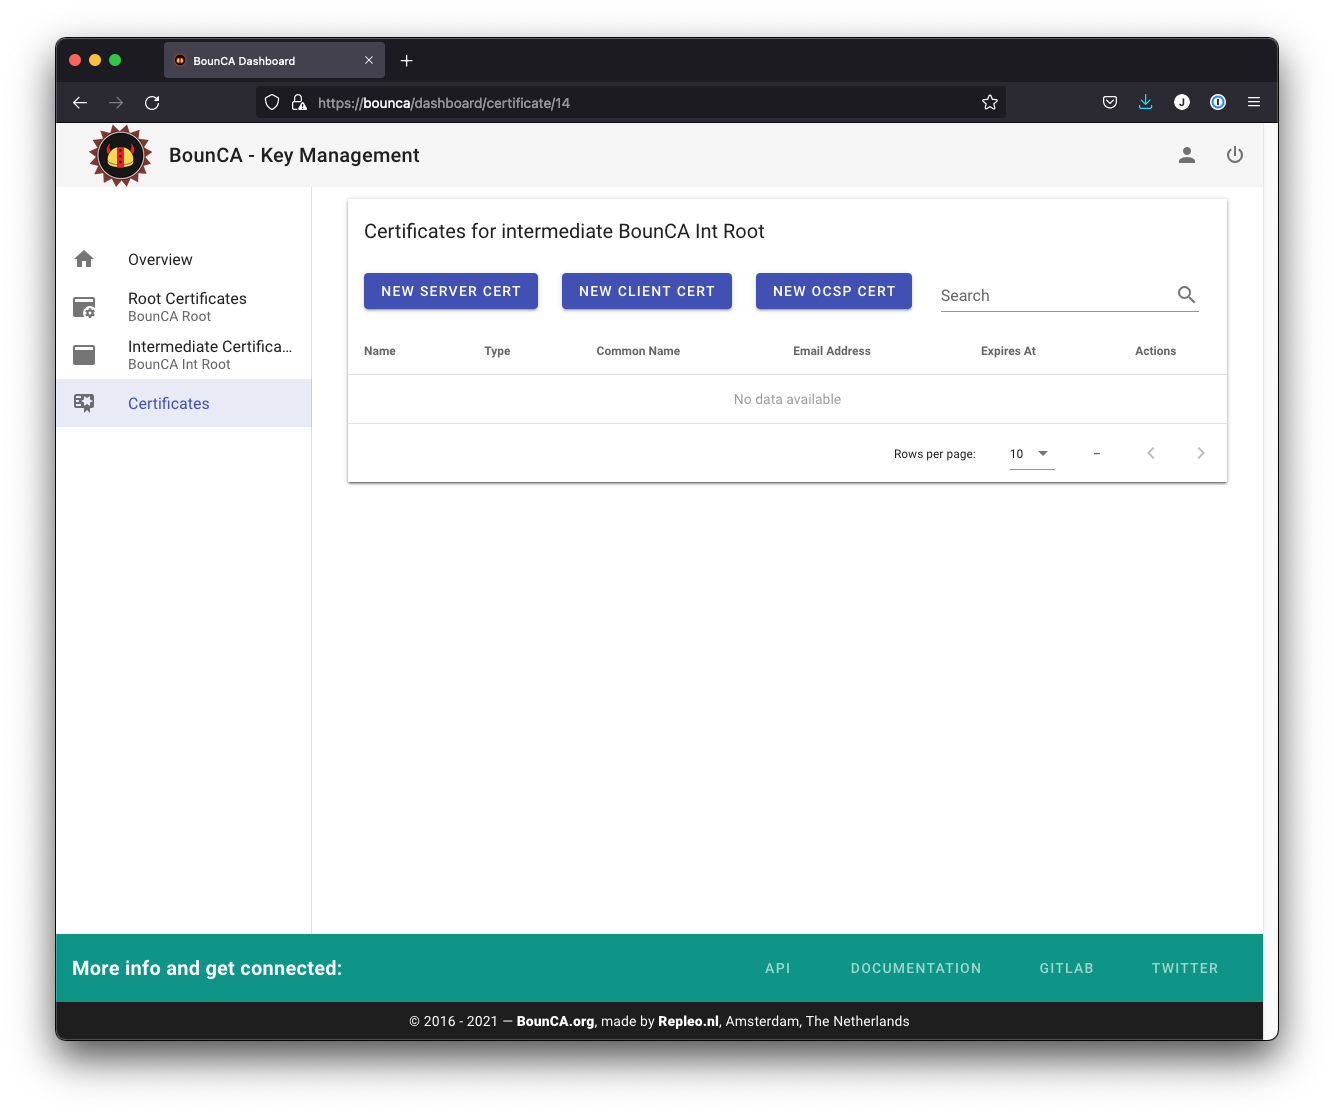
Step into intermediate certificate
Click on the New Server Cert button to add a new server certificate, and a form will be shown.
For server certificates, the Common Name must be a fully qualified domain name (eg, www.example.com), and you also
need to add it in the SubjectAltNames field.
Note that the Common Name cannot be the same as either your root or intermediate certificate.
Certificates are usually given a validity of one year, though a CA will typically give a few days extra for convenience. Our root and intermediate pairs are 4096 bits. Server and client certificates normally expire after one year, so we can safely use 2048 bits instead.
Note
Although 4096 bits is slightly more secure than 2048 bits, it slows down TLS handshakes and significantly increases processor load during handshakes. For this reason, BounCA uses 2048-bit pairs.
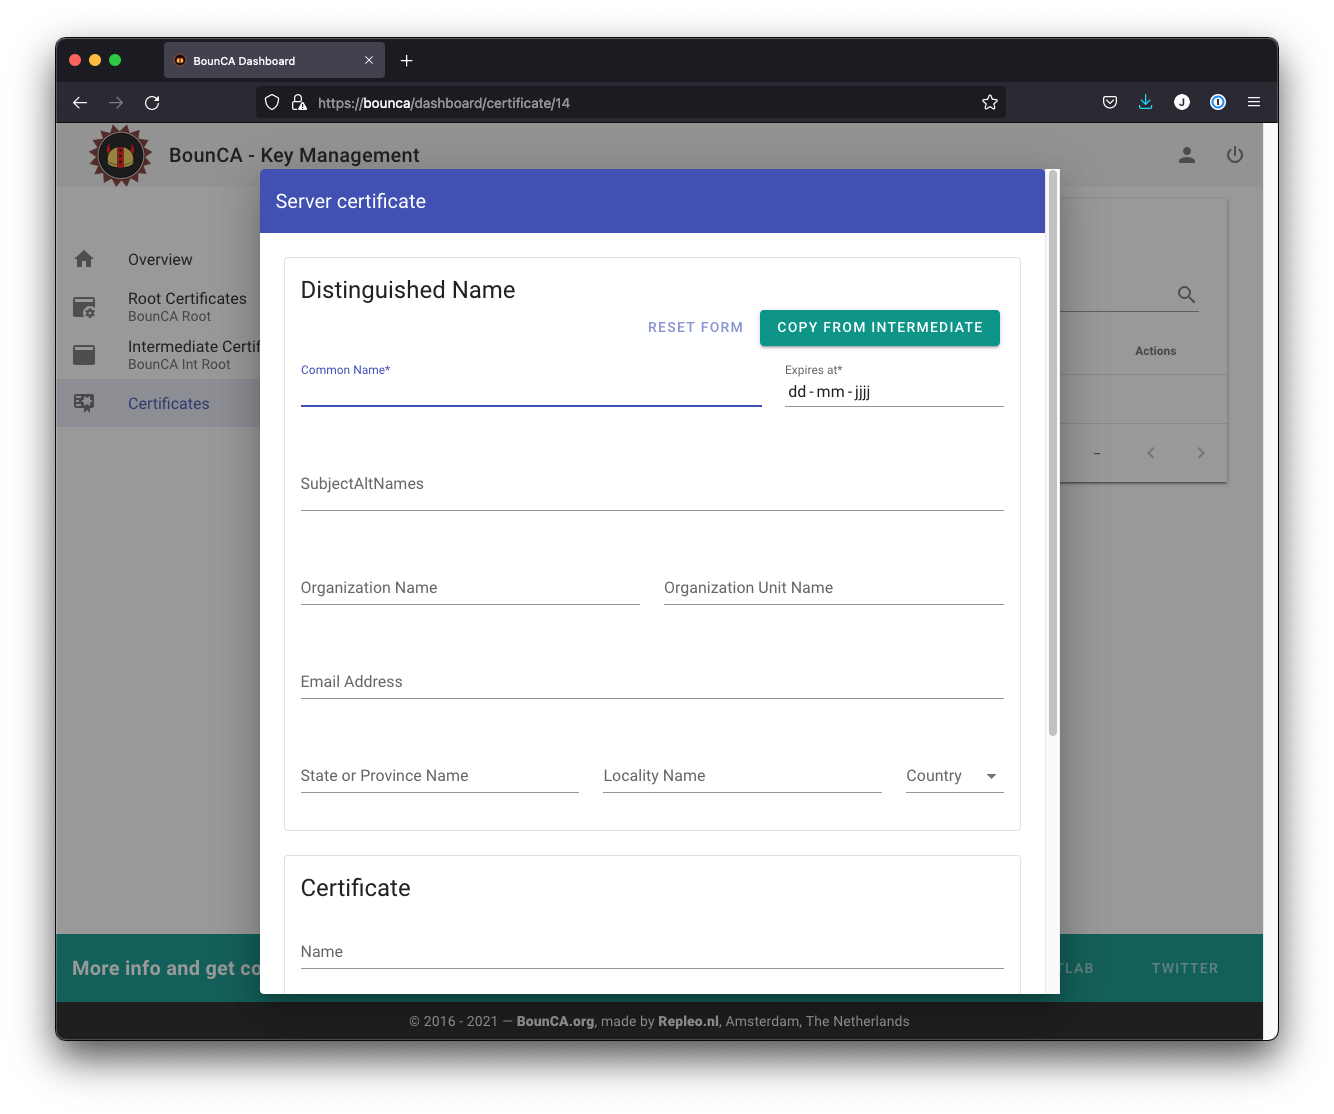
Create SSL server certificate
You can copy the distinguished name information from the intermediate certificate by pressing the Copy From Intermediate button.
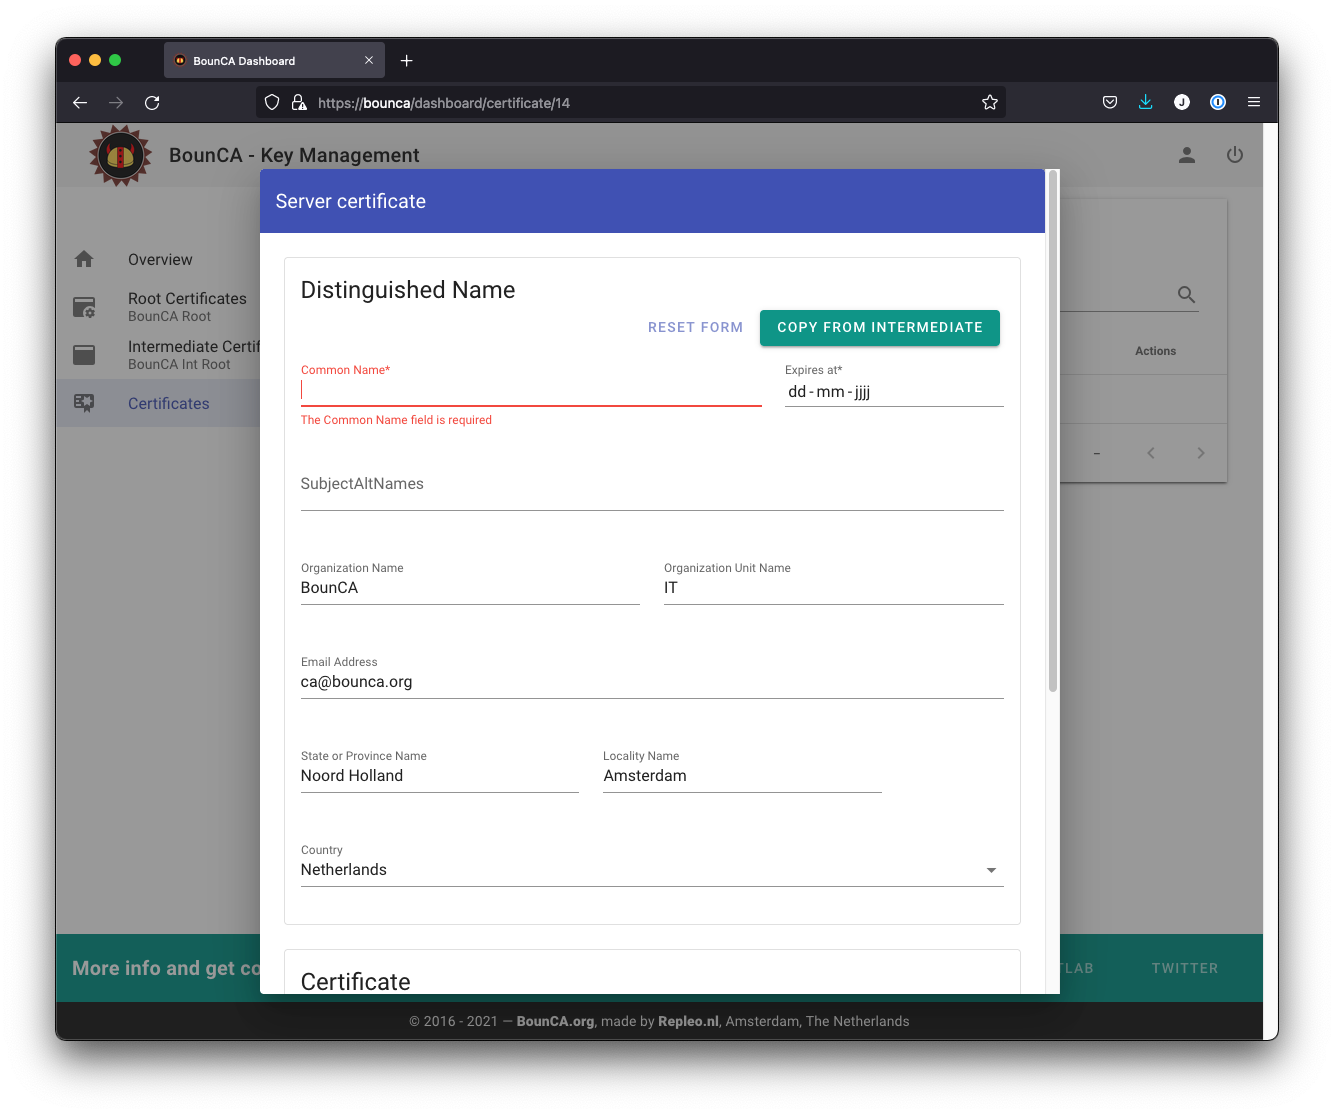
Copy Distinguished Name from Intermediate
You can use the certificate for multiple domains and IP adresses using the SubjectAltNames fields of the X.509v3 extensions.
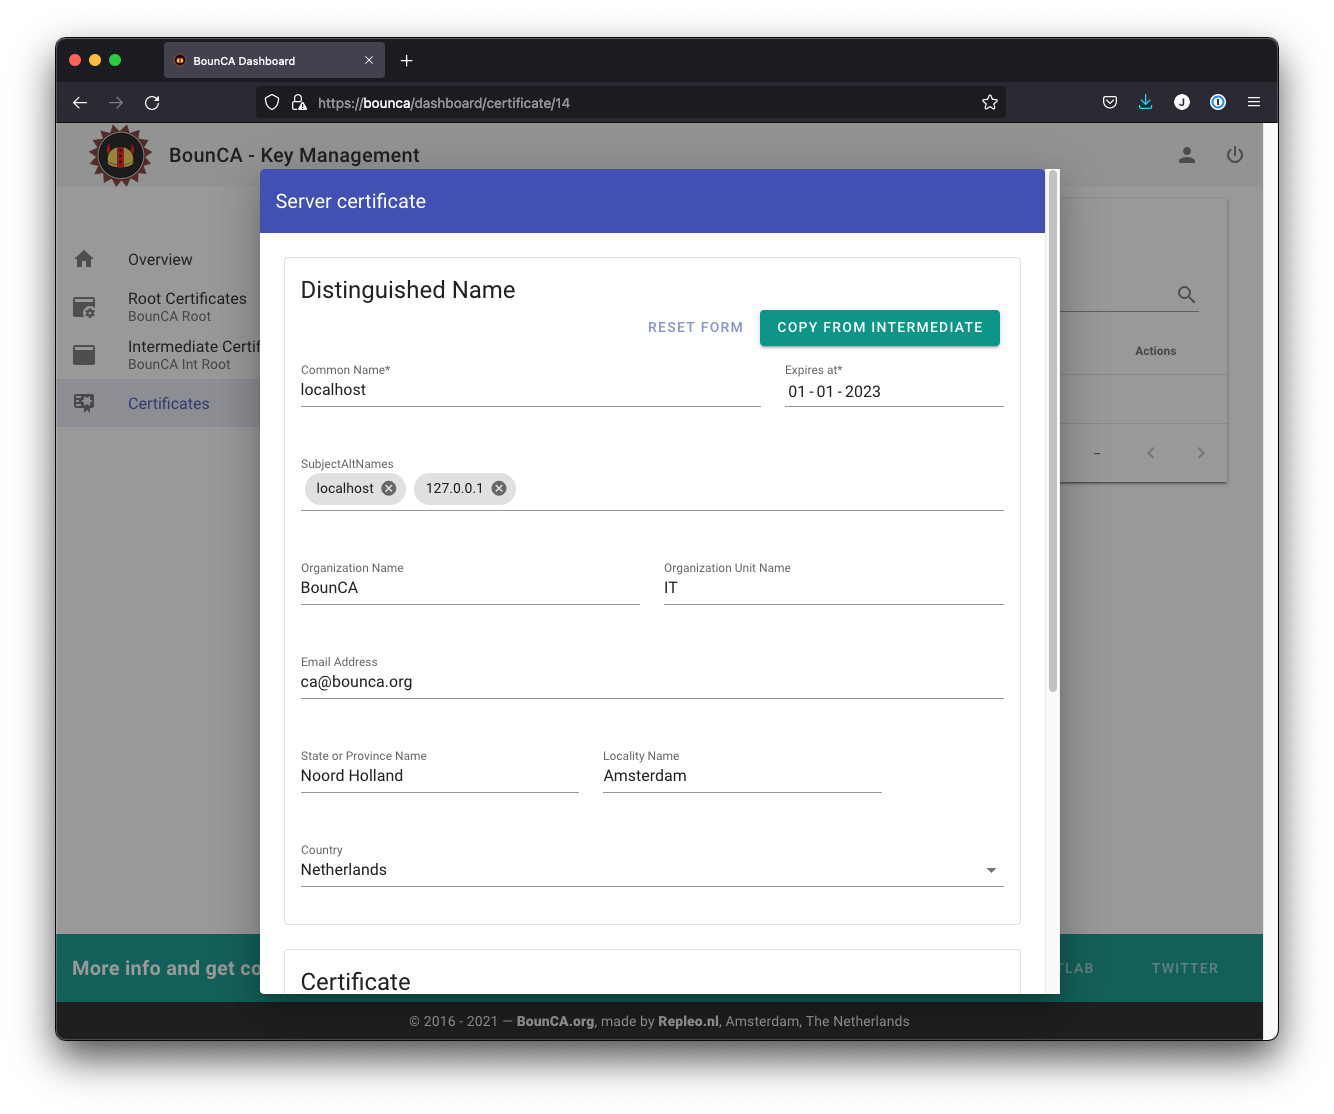
Enter subject alternative names
You need to provide the passphrase of the intermediate certificate to sign the key of your server certificate. It is not necessary to provide a passphrase for the server certificate self. If you install the certificate on a server, having a passphrase on the server key will block automatic restart.
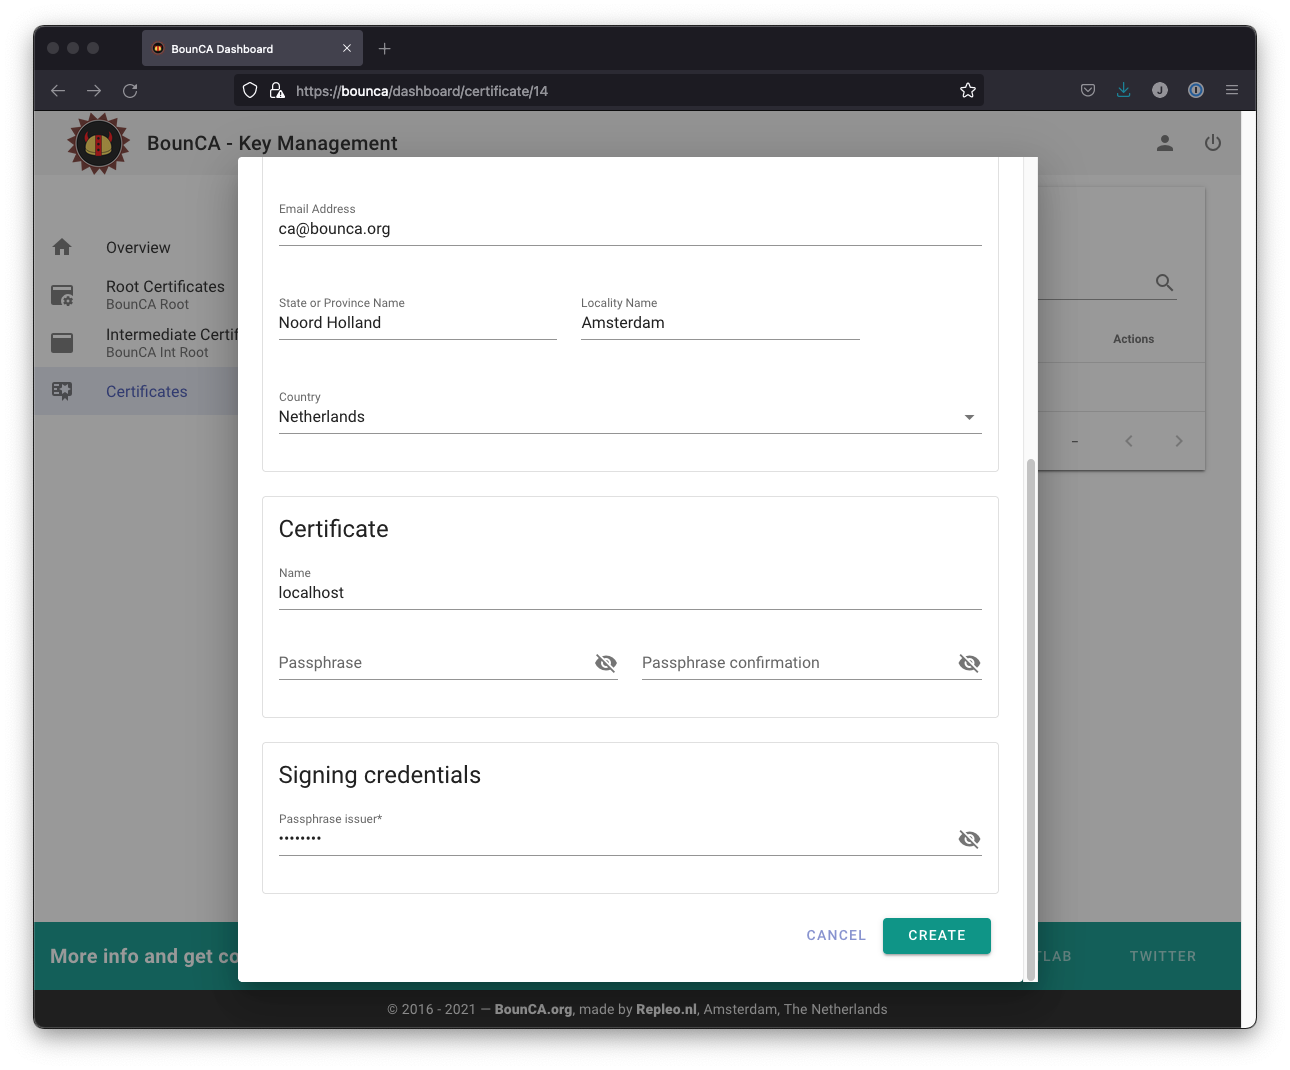
Enter passphrase issuer certificate
The server certificate will be generate.

Server certificate has been generated
You might inspect the new certificate. The Issuer is the intermediate CA. The Subject refers to the certificate itself.

Inspect server certificate
You can also see the subject alt names in the X509v3 extensions section of the certificate.
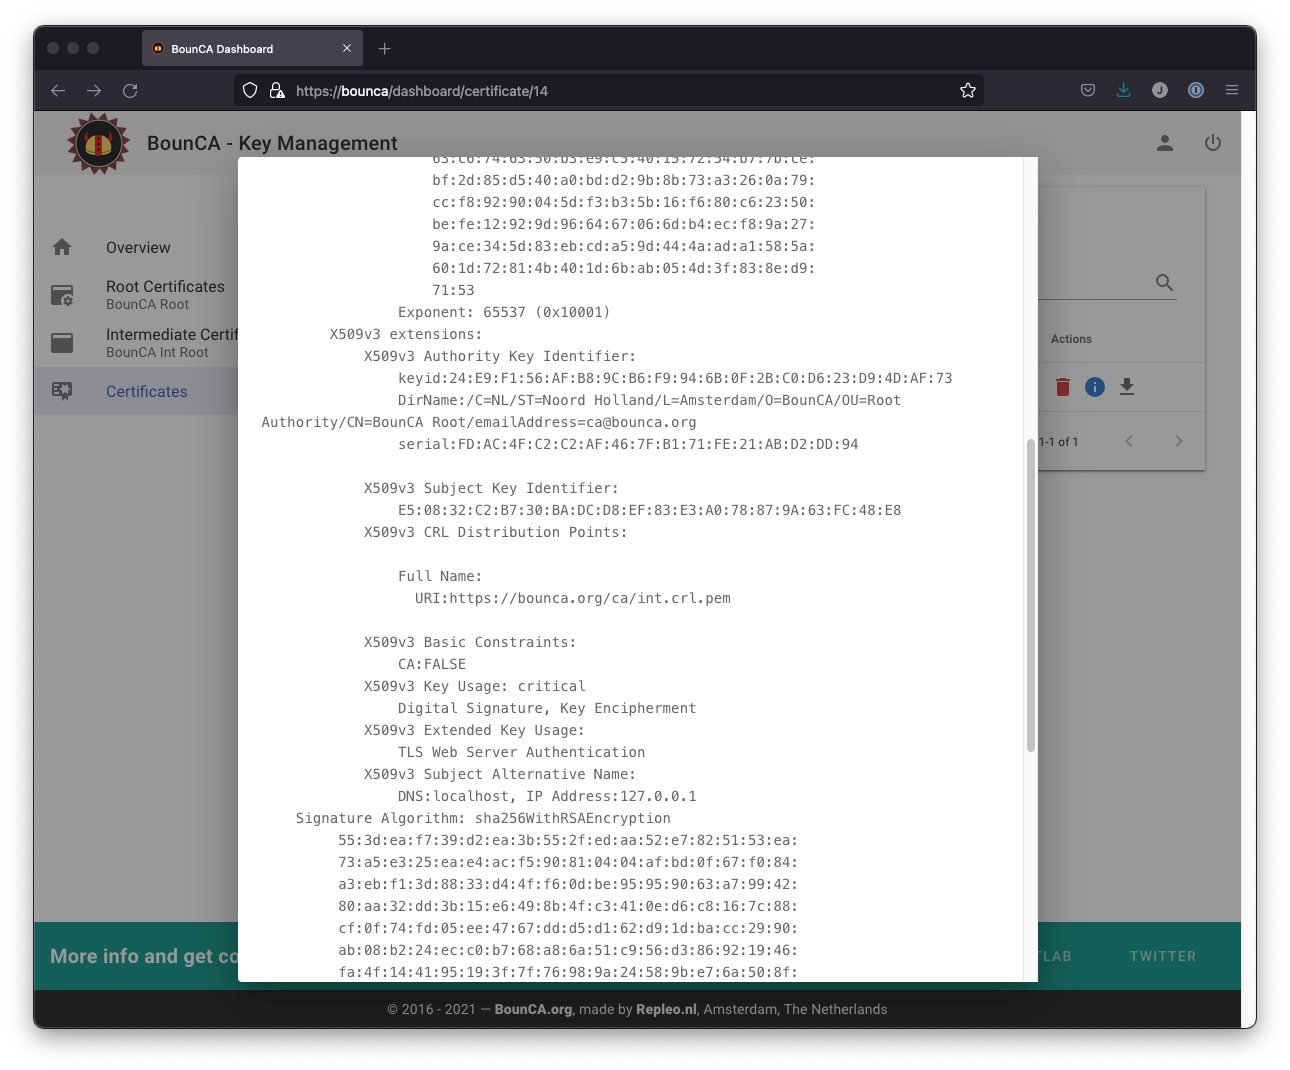
Inspect CRL and OCSP revocation links
This guide shows you in a couple of steps how to install the generated SSL certificate on Nginx to provide HTTPS access to your webserver. You can find the configuration of this tutorial in demo nginx ssl.
First, you can download a packaged key and certificate zip from BounCA.
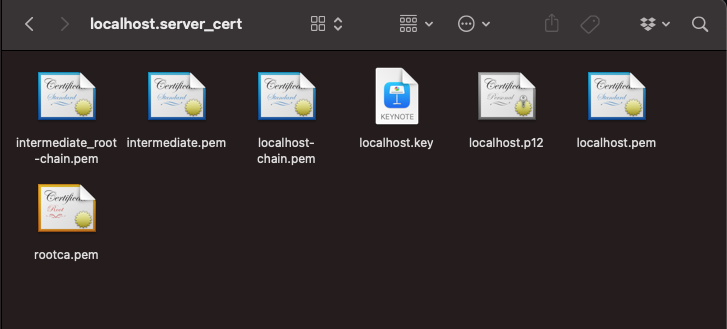
Content of the SSL certificate zip package
The zip package contains multiple files:
rootca.pem: The root authority certificate
intermediate.pem: The intermediate authority certificate
intermediate_root-chain.pem: Chain of intermediate certificate and root certificate
<domain>-chain.pem: The certificate including its complete root chain
<domain>.key: The key of your certificate
<domain>.pem: The certificate file
<domain>.p12: A PKCS12 keystore containing the key and certificate
We assume you have added the root ca to your trusted certificates.
If you open the <domain>-chain.pem you can check the trusted chain.
Or you can use openssl to verify the chain: openssl verify -CAfile rootca.pem -untrusted intermediate.pem localhost.pem.
The command should return OK.
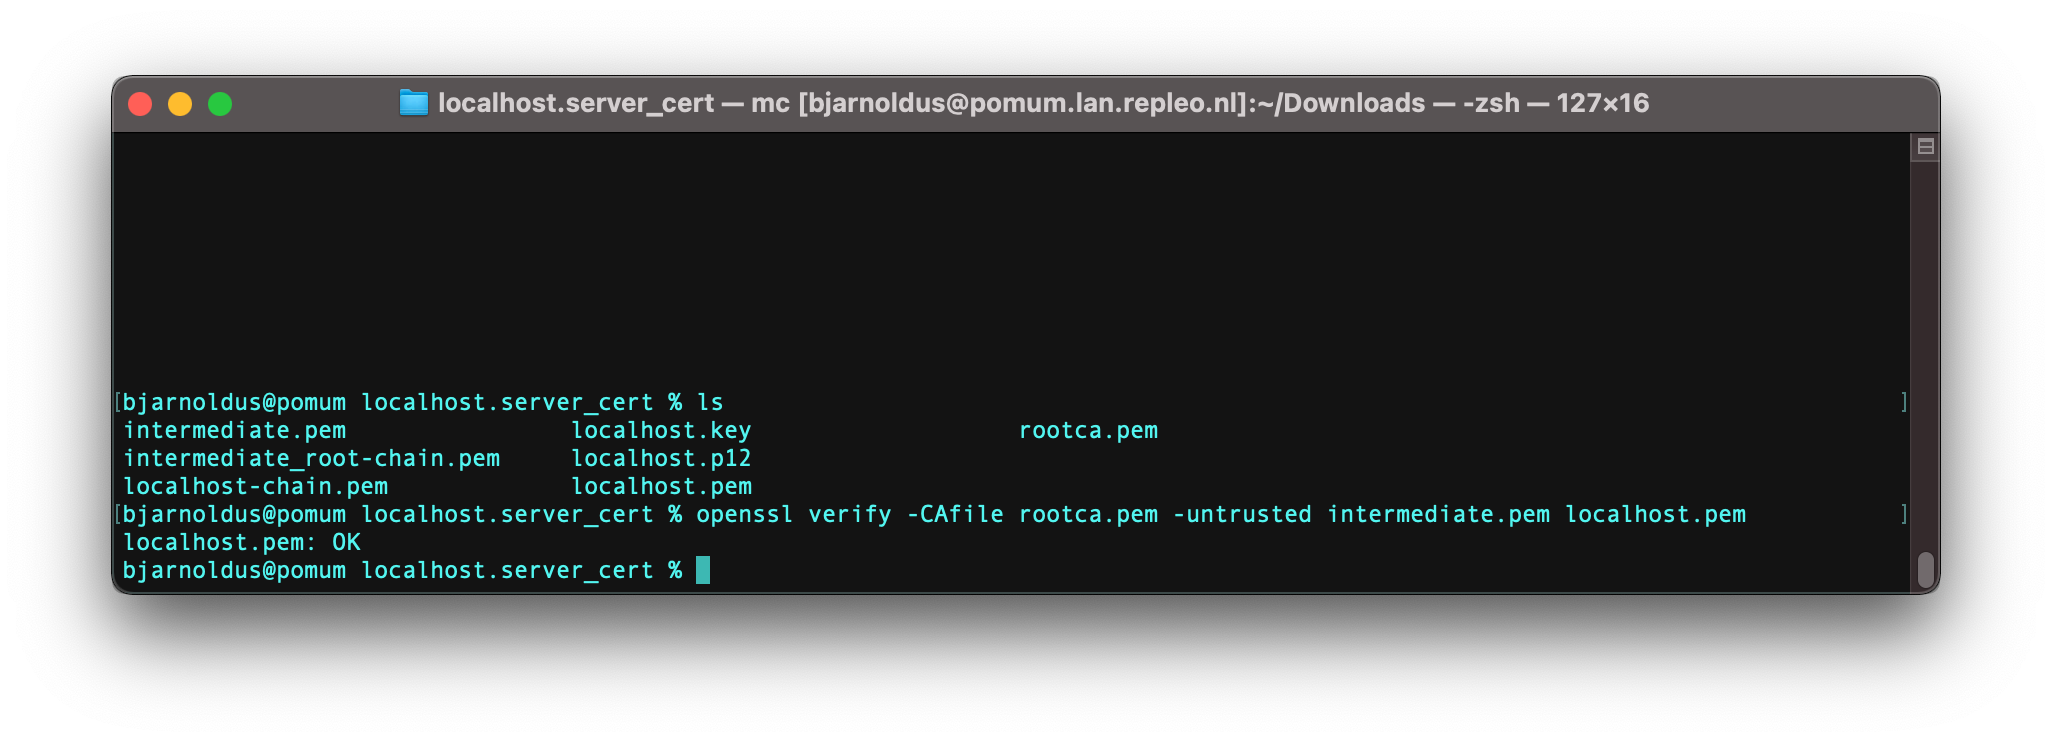
Verify self-signed certificate is trusted via OpenSSL
To enable SSL within nginx you should copy <domain>-chain.pem and <domain>.key to your nginx SSL folder.
Make sure you set the access rights:
- <domain>-chain.pem: 0x644 for nginx user
- <domain>.key: 0x400 for nginx user
Add the following server block to your nginx server:
server {
       listen       443 ssl;
       server_name  localhost;

       ssl_certificate      ssl/<domain>-chain.pem;
       ssl_certificate_key  ssl/<domain>.key;

       location / {
               root   html;
               index  index.html index.htm;
       }

}
It specifies that the server should listen to port 443, using SSL and it defines where it can find the key/certificate pair.
Restart the server and visit your website. It should show a valid and trusted HTTPS connection, and you will see the lock in the URL bar of the browser. When you click on the lock, you will see that the SSL connection is trusted using your personal self-signed certificate and root authority.
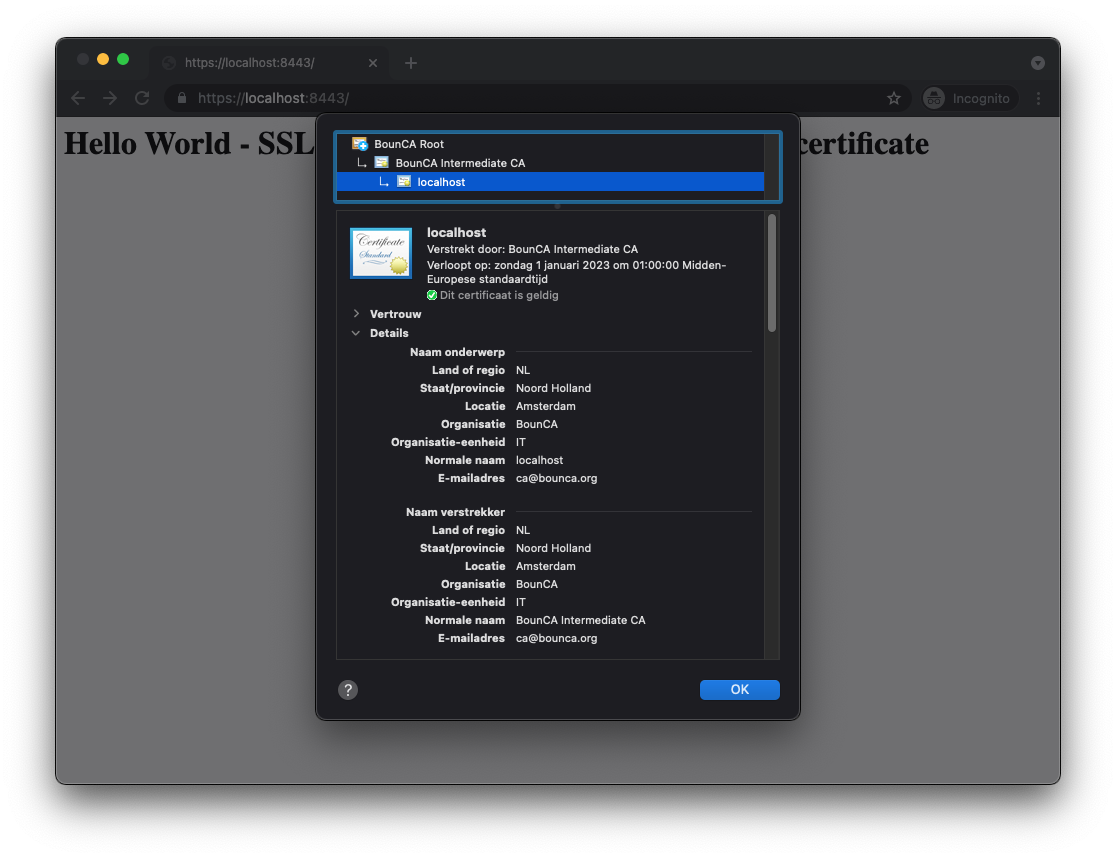
Verify HTTPS connection is now valid and trusted
Server, Client and Mail certificates are usually only valid for one year. To create a new valid certifcate you must generate a new one with a new expiration date. BounCA offers a renewal button to renew the certificate. It is the green double arrow button next to the certificate.
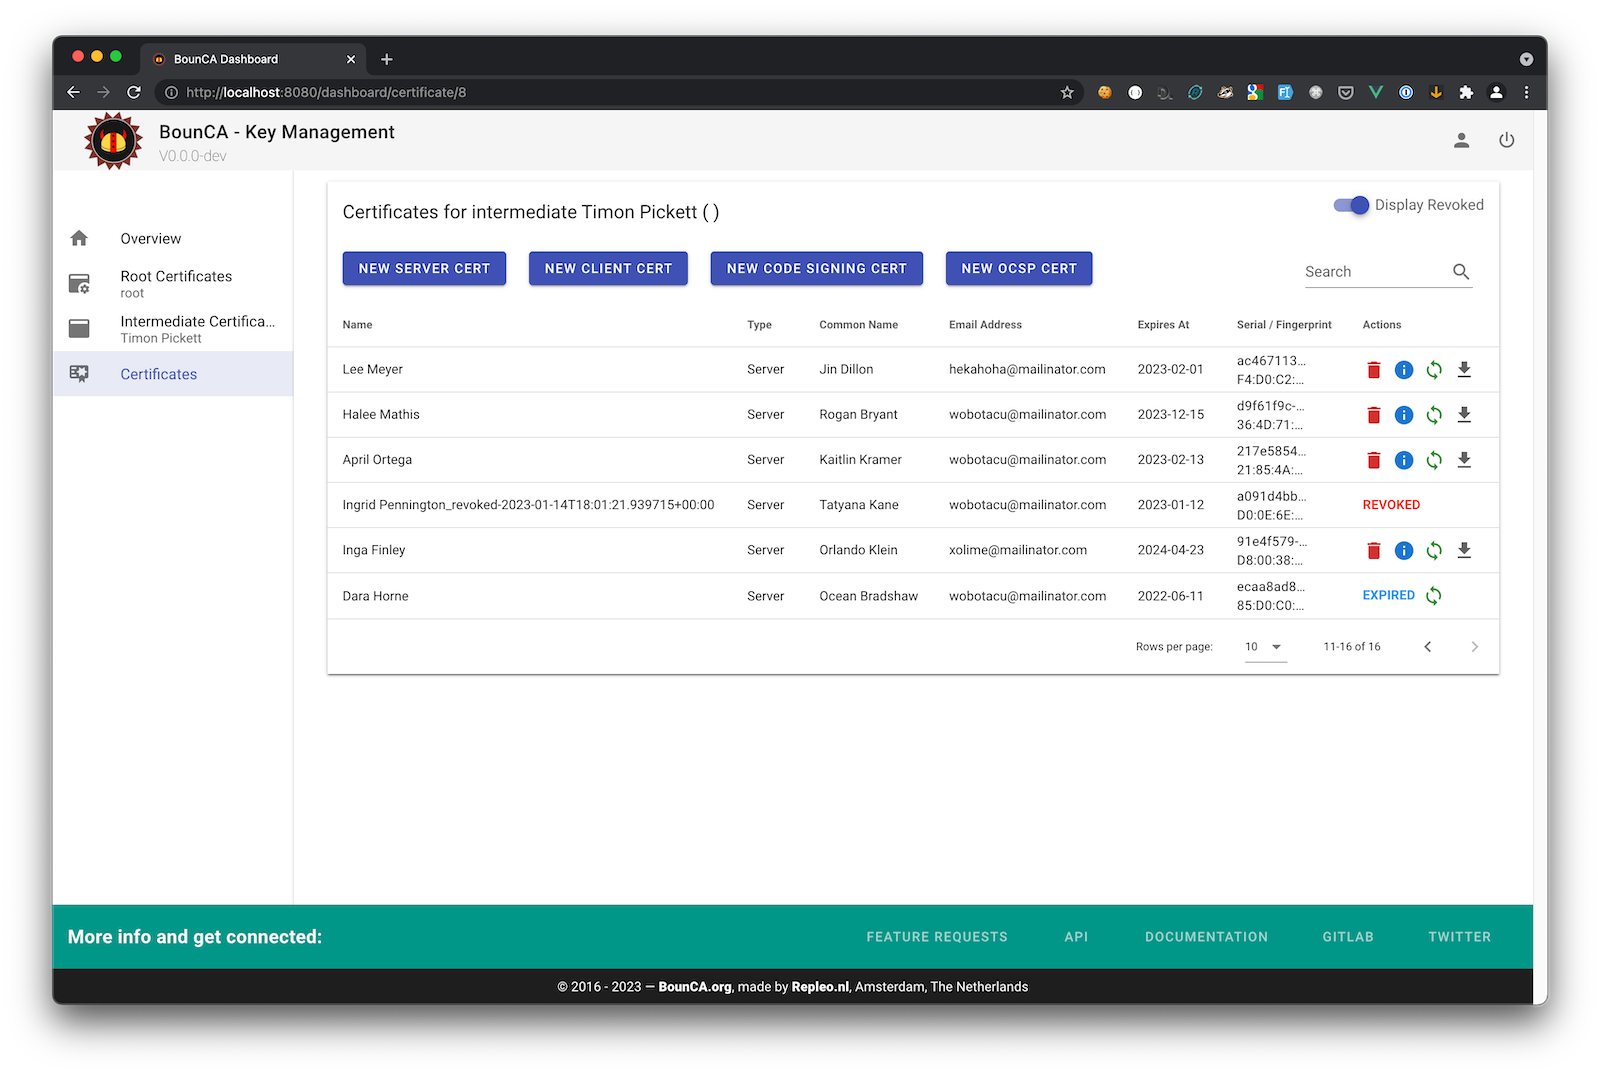
List with certificates, and including expired ones
When you press the renew button a dialog modal will open where you can set a new expiration data, and fill in the passphrases. The passphrase of the signing parent certifacte is required.
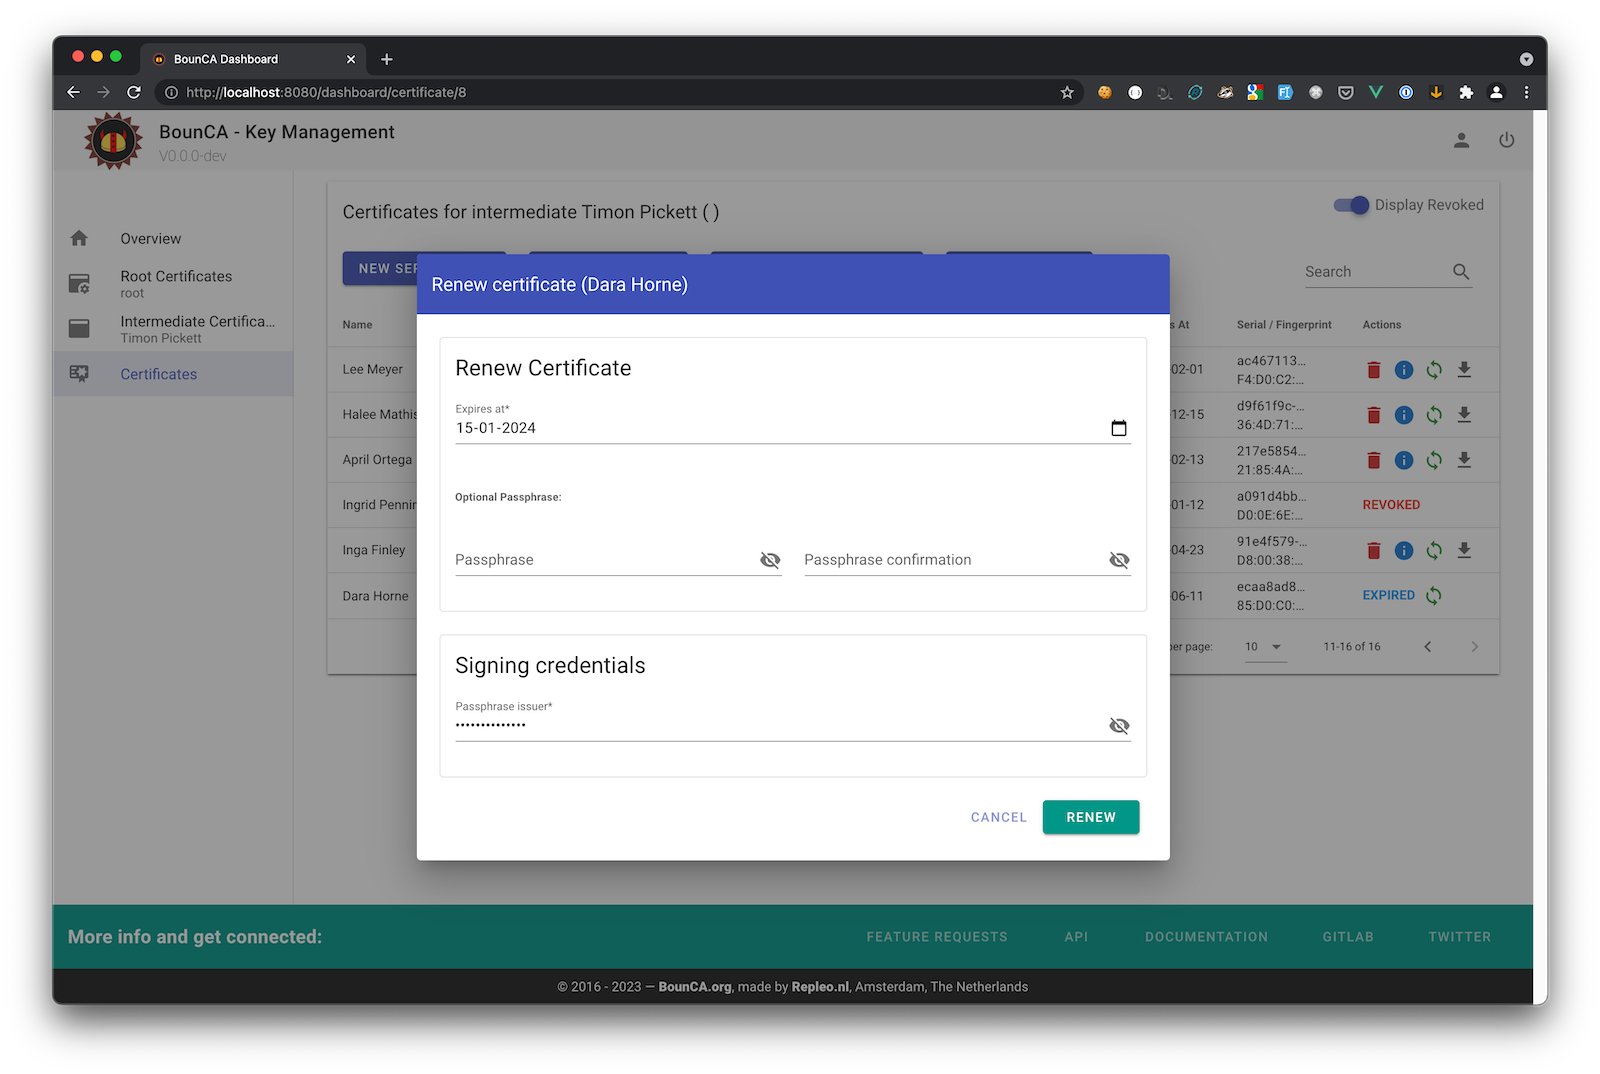
Renew certificate modal
After you press renew, the old certificate will be revoked, and a new one is generated using the same information as the old certificate. The only field what will change is the expiration date. After generation, download the certificate, and install it on the server. Also the CRL of the authority will be updated.
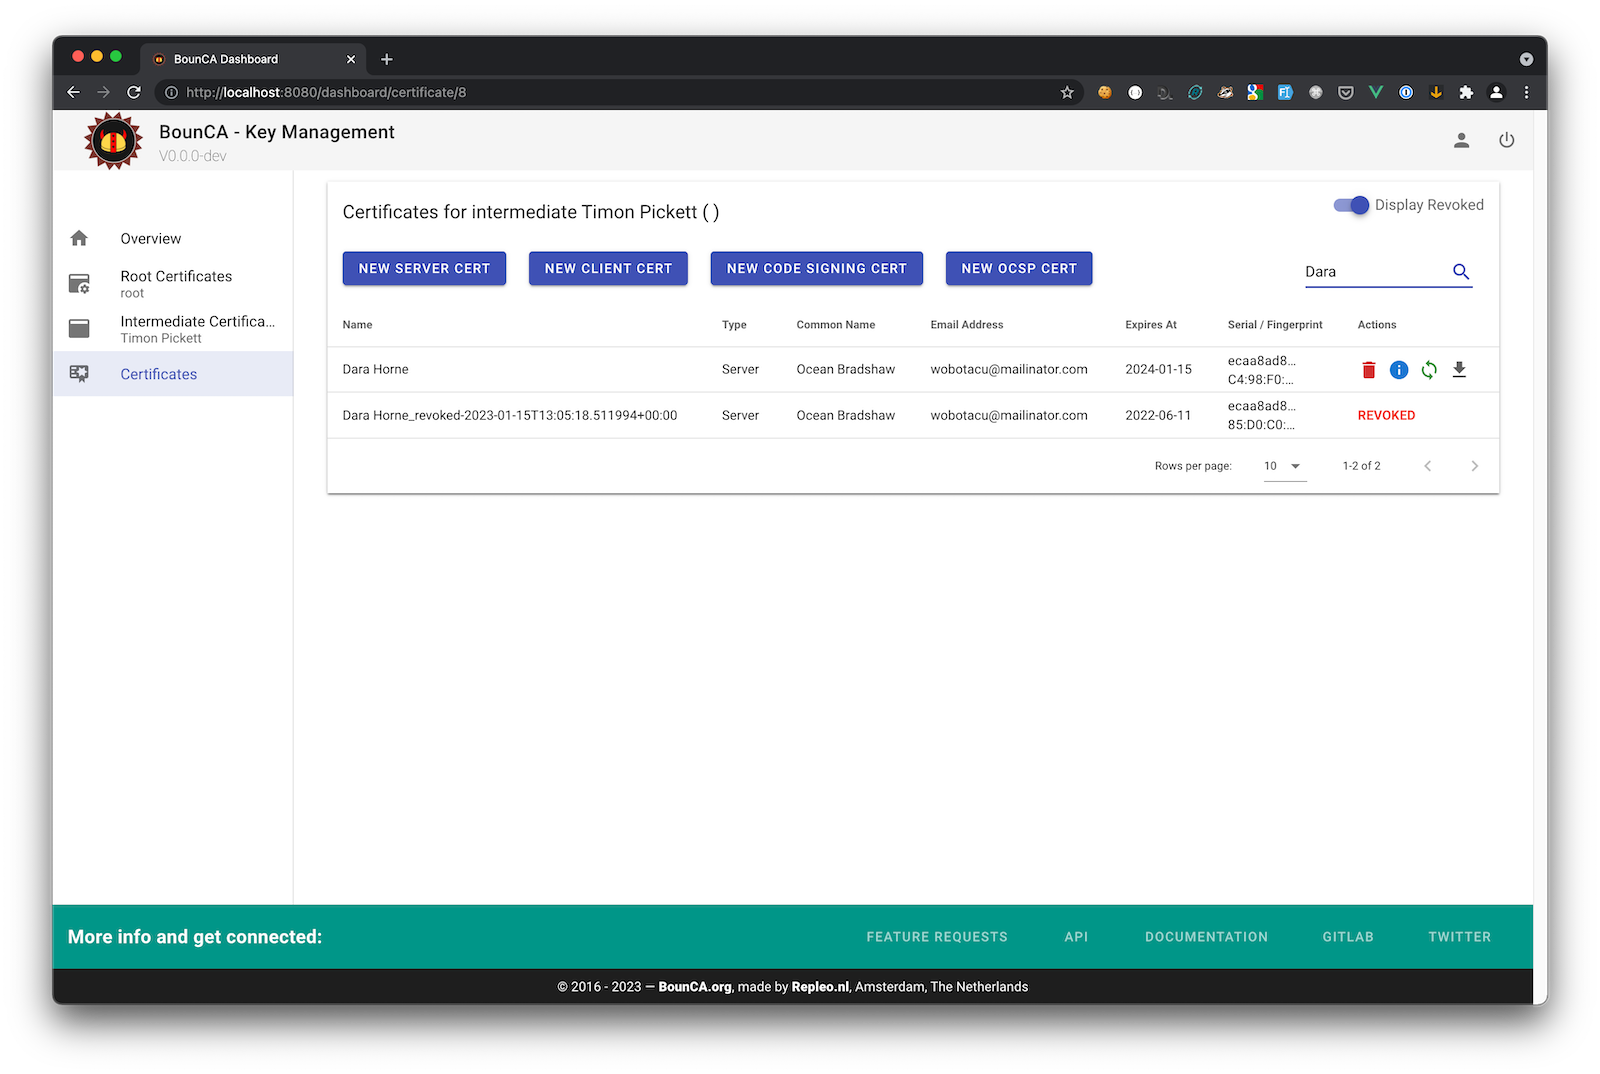
Result of the renewal of certificate